
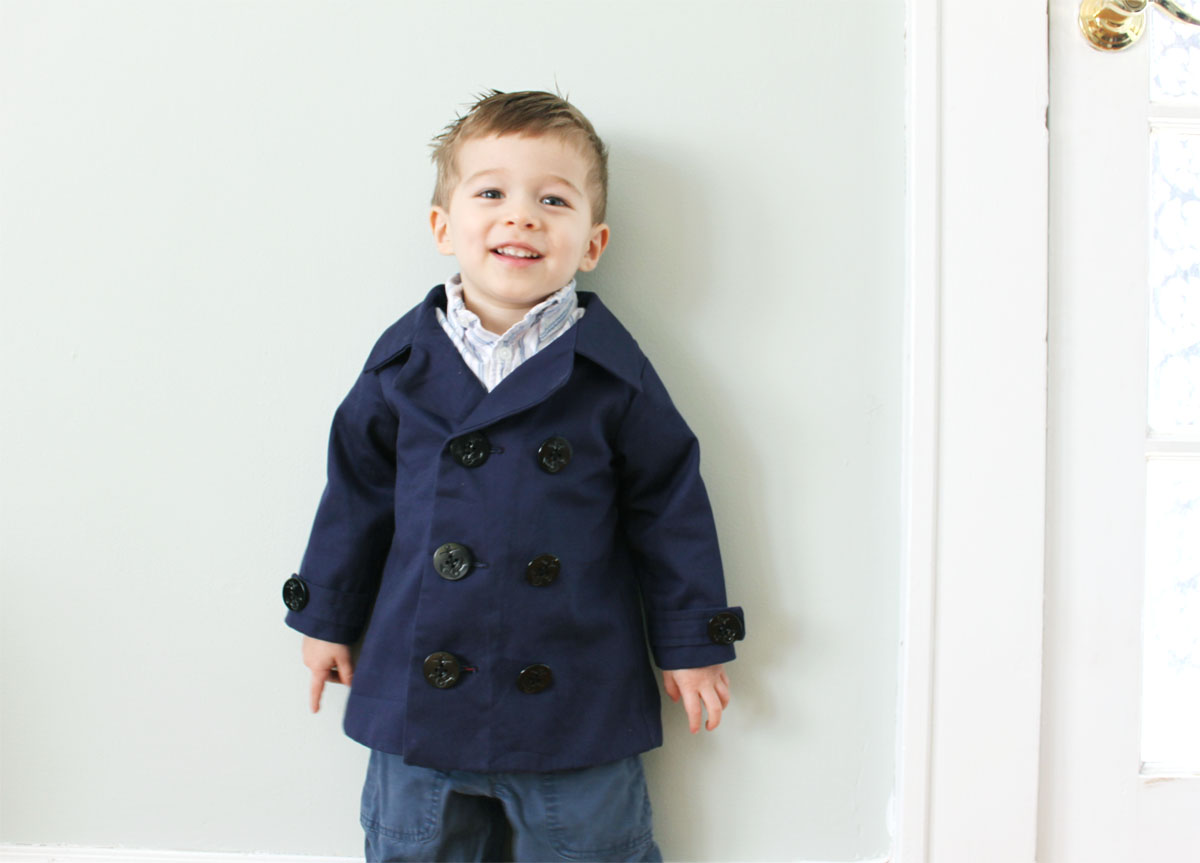
 Guess who has new spring outerwear? For this he should be thanking Rae and Dana, who curated another fantastic month of boy centric projects, which after seeing, made me immediately want to make something for him. To join in the celebration I will be sharing my tutorial on little jackets, and how I embellish them for boys.
 I really love stylish little boys, and I think that jackets are nice staples that can really elevate a little boys wardrobe. Most stores carry sizes too bulky for my little guy, so I like to tailor these jackets to fit my son by sizing it from a jacket that I know fits him, and going from there.
I find that little details like sharp collars, faux cuffs, and fun buttons can completely transform a jacket, and once I understood the basic construction of jackets, it was pretty easy to throw together.


These little jackets are pretty easy to make for a novice seamstress. I will show you how to make the basic pea coat, sized from a piece that you know already fits your child, and will also show you my alterations that make the miniature suiting look more tailored.
For these jackets I used about 1 yard of 58" suiting fabric, specifically navy twill, and about the same for the lining, in this case I used a woven plaid I found at Ikea.
I based the size off of a jacket from my son's closet that I knew fit him perfectly (not too loose, and not too tight) by laying the jacket over a piece of parchment paper and marking points at the shoulder, armpit, neck, and at the bottom of the jacket. Then I added some shape to the sides by making it flare out slightly. I also added three inches to the chest so that the lapel will overlap for buttons, and about 3-4 inches on the bottom. After I got the basic shape, I added about 1/2" to the entire perimeter of the pattern for the seams. The back of the jacket, and hood can be made in the same manner, just make sure to add for seam allowances. For the sleeves add about 2" of length at the cuff. If you are unsure about the size, make a muslin before you cut into your suiting material and alter the size accordingly.

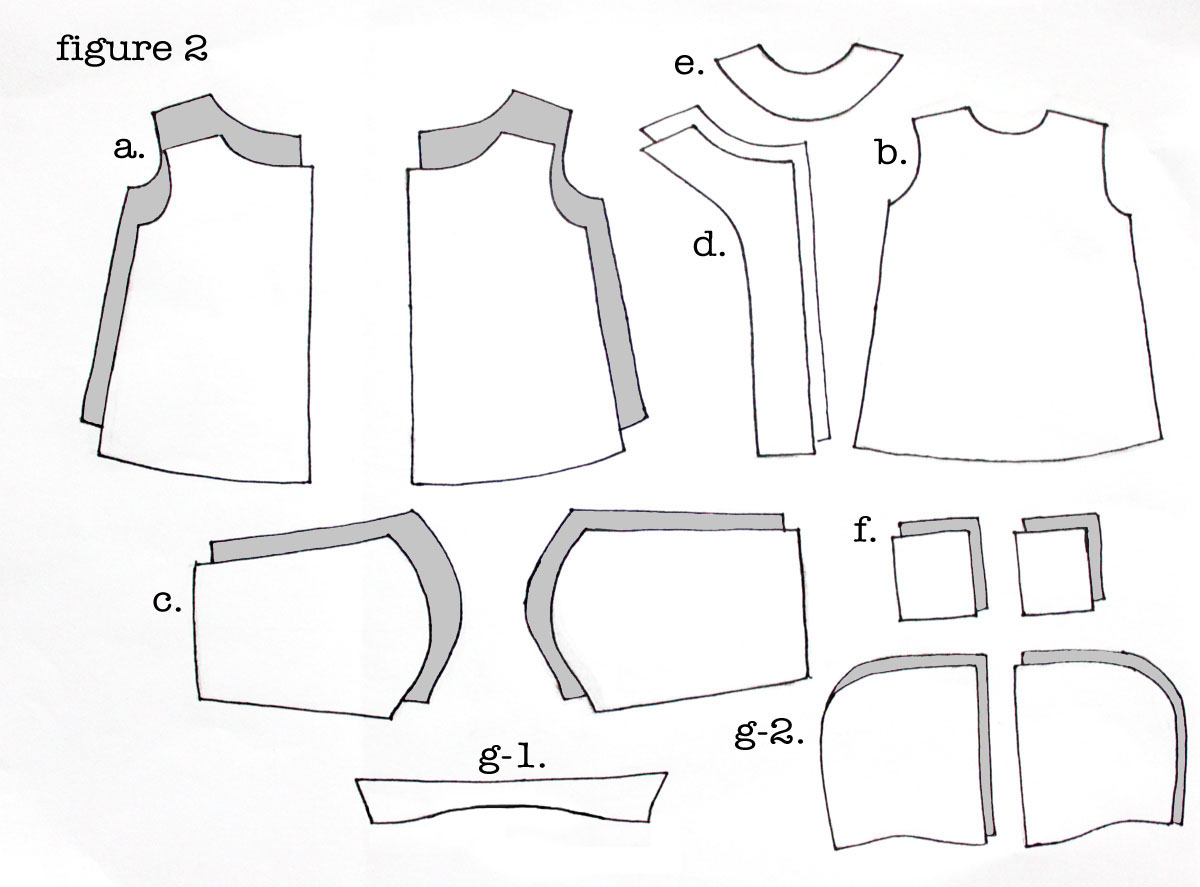
b. 1 back of jacket and 1 lining
c. 2 sleeves and 2 linings
d. 2 facings, for each side
e. 1 back facing *
f. 2 pockets and 2 pocket linings *
g-1. 2 collar pieces *
g-2. 2 hood pieces and 2 hood linings
*For rough measurements and instructions on these pieces, scroll down to the figure labeled "Facing, Pockets andCollar"

2. Put together self lined pockets. a.With right sides facing, sew together the pocket exterior to the pocket lining with 1/4 inch seam, leaving a small opening at the bottom. b. Snip the corners, and turn the pocket out. c. Top stitch across the top edge of the pocket.
3. Place and sew on your pockets. On the right side of the shell place your pockets so that they line up properly, and then sew them on, making sure to reinforce the top edges.
4. Assemble the sleeves. If you would like to add the faux cuffs, see the figure labeled "Optional cuff" at the bottom of this post. Otherwise, prepare your sleeves and then pin and sew them onto the body of the shell and lining. Once the sleeves are ready, you can insert the lining into the shell of the jacket. Try to evenly distribute the fabric, making sure there are no lumps, and then pin at the shoulders and lapel.
5. Assemble your facings. Sew together the front facings to the back facing at the shoulders.
6. Press 1/4" of the facing over along its edge.
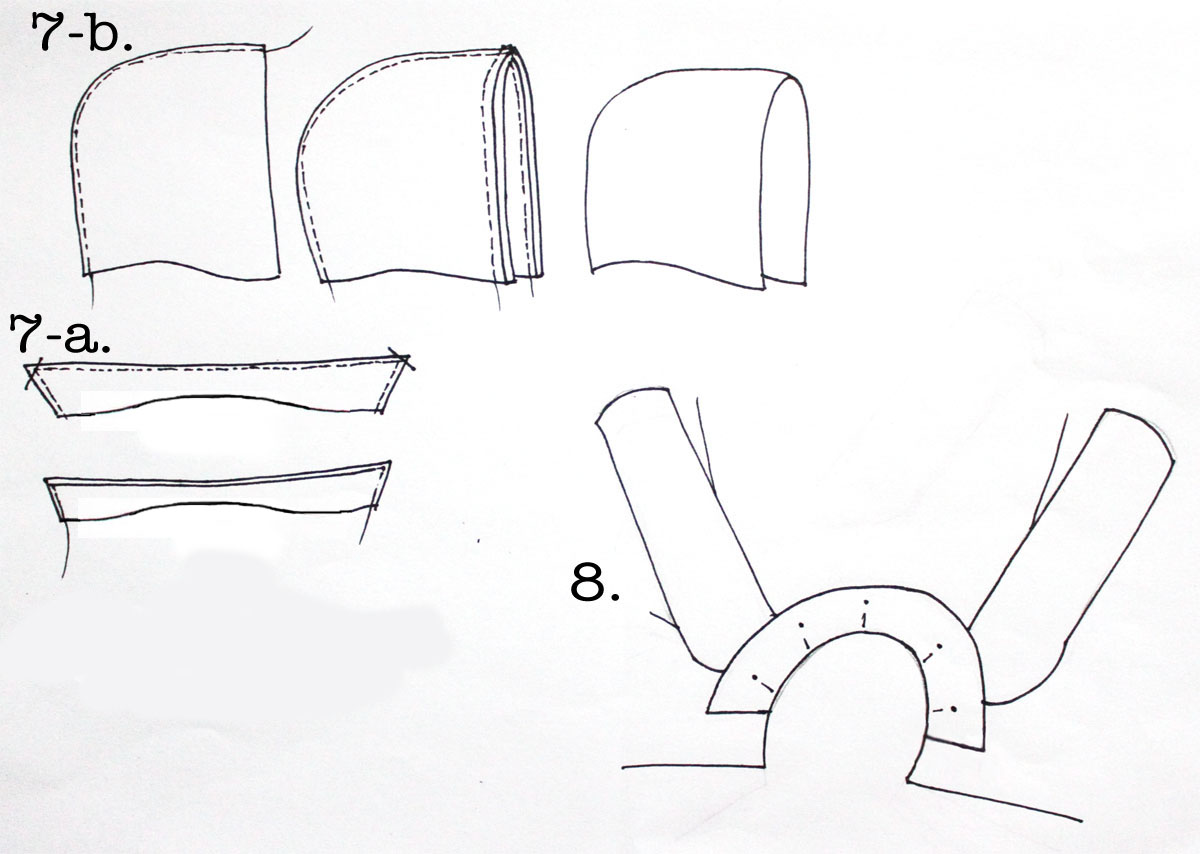
7-a. Prepare the collar by sewing the right sides of the fabric together. Trim the corners, turn it out, press and topstitch.
8. Mark the midpoint of the collar, and then mark the midpoint of the back of the neck. Match the points up, and then wrap the collar around the neck until it lines up evenly across the length of the neck. Pin or baste into place.

9. Sew on the facing. Mark the mid point of the facing, and with right sides facing, match it up to the midpoints of the collar and neck of the coat. The layers should be in this order: facing, collar, shell, lining. Work the facing around so that it lines up along the neck. If, at the lapel, there is excess length along the facing, pin it so that it lines up along the side of the jacket as best as possible. Pin or baste into place, and then starting from the bottom of the jacket, sew up and around the neck, and then down to the other side. Trim corners and clip along the neck seam.
10. Attach the facing to the lining. Flip the facing around so that it is laying against the lining, work it around so that it lays flat and evenly, and then pin it in place. Then hand stitch the facing to the lining, making sure not to stitch all the way through the shell.

11. Finish the hem and sleeves. Fold the hem of the coat about .5 - .75", while making it as even as possible. Pin in place and then hand stitch a hem along the bottom. Finish the sleeves in the same the way.
12. Flip the jacket around and add buttons or other closures.


To make the facings, I made a copy of the front jacket piece, and then marked a line 3" in along the side, with a gradual curve up to the shoulder. I did the same for the back, starting from the same shoulder point that I ended at on the front, and then making a gradual "u" shape along the back of the neck. For the pockets, I cut rectangles that were 4.5" tall, and 4" wide. For the right length collar, you can mark 3" in from the edge of your lapels, and then measure point to point along the neck line. Mine came out to be around 14.5", so I started with a strip of fabric that was 15.5" long across the top, and about 14.5" long across the bottom since the edges are slanted.
I hope that this walkthrough might inspire you to draft a pattern and create a fun piece of clothing for your child. If you have any questions, you can email me at liliashp at gmail.com.

25 comments:
Great tutorial, I have been wanting to make new coats for my boys. Thanks so much for sharing.
This is fantastic. I love that so many folks out there are teaching others how to draft their own patterns. Thank you!
Thank you so much for sharing!
AHH! haha :) awe. this totally put a smile on my face! great job, momma! ori is getting SO big and handsome. besos!
love-
jess
Know if you are not blogging you are busy on a project. What a great blog and how wonderful you have shared the pattern. (On a special note---Ori looks a lot like his Grandpa Ken in the Pea Coat pic). You amaze me LJ--
Love, Ma
Love the ideas for making each a little different! Thanks for sharing all the steps as well. I'll have to add this to my to do list!
Your coats are fantastic! You make the process look so easy. :) I'm pretty sure it'll take me a lot of practicing to look make mine look half as good as yours. Thanks for sharing!
Um these are ADORABLE! I can't decide which are my favorite! You are so talented!
That is great, I am marking this for the fall.
You outline the construction of a jacket to make it seem SO easy... I may gather the courage to try this one, thanks!
I just wanted to thank you for all your time putting this together and generosity in sharing it during CTB month. This was one of my favorite tutorials. I'm due with my first in August and I would love to try this out (for a boy or girl!). So adorable.
Thank you for this tutorial, it's such a great idea ! I love the navy blue, and the green one, too, they look great. Thank you again !
I was just browsing the internet for crafts- projects and clothes to make for my babyboy...who hasn't even been born yet <3...
Love this project, love the site and I'm planning to get busy very soon ;-)
Love, Mali from Norway.
Thank you - what lovely jackets!
Good morning! I am including this adorable jacket as part of a round up of boys dress up for Easter clothes. You can check it out here: http://bisforboycreations.blogspot.com/2011/04/fabulous-finds-for-boys-all-dressed-up.html
Hello. And Bye. Thank you very much.
Hello. And Bye. Thank you very much.
Great tutorial! I am featuring on my blog today! (3-9-1013)
http://seemesew.blogspot.com/
Thank you! Looks like a great tutorial. I love the green wool version:)
Thank you so much! I used your tutorial to make the base for a Dalek costume for my 3 year old son. All I have left is the decorating! Your instructions worked beautifully. Thank you again!
Please, i´m a portuguese mother of a 3 years old boy and a new sewing entusiast and i´m waiting for a new baby about 9 week ago... I don´t have money to spend in more sewing lessons but i think if you can send me the patterns of this jacket, certanly a can make some beautiful jackets to my son Santiago. Plase, can you sentg me in scan or in pdf copys of your patterns for 3or 4 years old?
my email is moky.sews@gmail.com. I´ll be so so blessed, because i haven´t no money to buy so moch clothes and with a new pregnaty....i have to create to make my son happy!!!
Kisses
I LOVE THESE PEACOATS, MY SONS WANTED THEN AND I NOW HAVE YOUNG GRADSONS THAT I WANT TO MAKE THEM FOR THANKS FOR THE DIREECTION ND I HOPE TO DOWLOAD
No dwnlooad od pattern
Hi, can you use this same pattern for a girl styled pea coat? Thanks for all your help and input :) Hope you have a lovely Holiday Season!
Blessings,
Amberlynn
Wow! new unique design bracelets. I love this collection. Thanks for share. Please Visit:
baby boy jackets
Ex Chainstore Wholesale Childrens Clothing
Wholesale Minx Clothing
Post a Comment